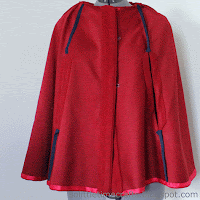
This entry describes alterations made to my Red Riding Hood coat originally posted here.
Sizing: originally 14, altered to reduce size
Fabric: felted polyester, no additional supplies needed for making changes
Cost: none
Assembly time: 13 episodes of McLeod's Daughters plus 1 Poirot, that's about 13 hrs
Instructions: no instructions available
Modification: decreased all pieces (minus collar) by 2"
Recommend: size this pattern prior to cutting
Last year, I made McCall's 6446 following the sizing on the envelope and the directions provided. Though the coat turned out well, when I put it on, it engulfed me. The neck was way too large, nearly falling off my shoulders, and the arm opening were way too low. Needless to say, I could not wear the parka in public or private. Originally, I thought that I would take the garment apart and make a completely different jacket. After more thought, I decided there was not enough fabric and opted for altering the original to something smaller.
 With nothing to loose, I cut two inches off every piece, minus the back yoke and front center. The button holes needed to stay where they were since I had no fabric leftover to recut the pieces. Doing this shrunk the overall width of the coat by eight inches and made the coat the correct size. In addition to the side seams, I also took two inches off the top and bottom. Four inches shorter also made this coat more flattering to my short stature.
In order to adjust the armholes, I measured the distance from my shoulder to elbow. This measurement was used as the center point for the opening placement. From this point, I measured up four inches and down four inches.
Bringing the coat in to make it smaller shrank the circumference of the neck. Like I said, I had no extra fabric which made cutting a new collar impossible. The workaround I came to was to put pleats equally placed around the collar. The original version was a self-lined collar, but I used lining and cut the correct size for the collar to stabilize the outer. I had to tack the collar together to make sure the lining stayed in place and could not be seen.
Bringing the coat in to make it smaller shrank the circumference of the neck. Like I said, I had no extra fabric which made cutting a new collar impossible. The workaround I came to was to put pleats equally placed around the collar. The original version was a self-lined collar, but I used lining and cut the correct size for the collar to stabilize the outer. I had to tack the collar together to make sure the lining stayed in place and could not be seen.
The inside of the coat was finished off by encasing the seams and using hem tape. I stitched the facing for the armholes and hems by hand and also had a couple of spaces that needed hand-stitching just to look nice.
I do like the coat better now that it is the correct size, but I would never use the pattern again (even though I threw it out awhile ago). It was way to complicated for a cloak. Like seriously, cloaks lack sleeves which should mean they are easy.


No comments:
Post a Comment